How to Use Kindle Scribe in 2024: A Comprehensive Guide for Digital Note-Taking

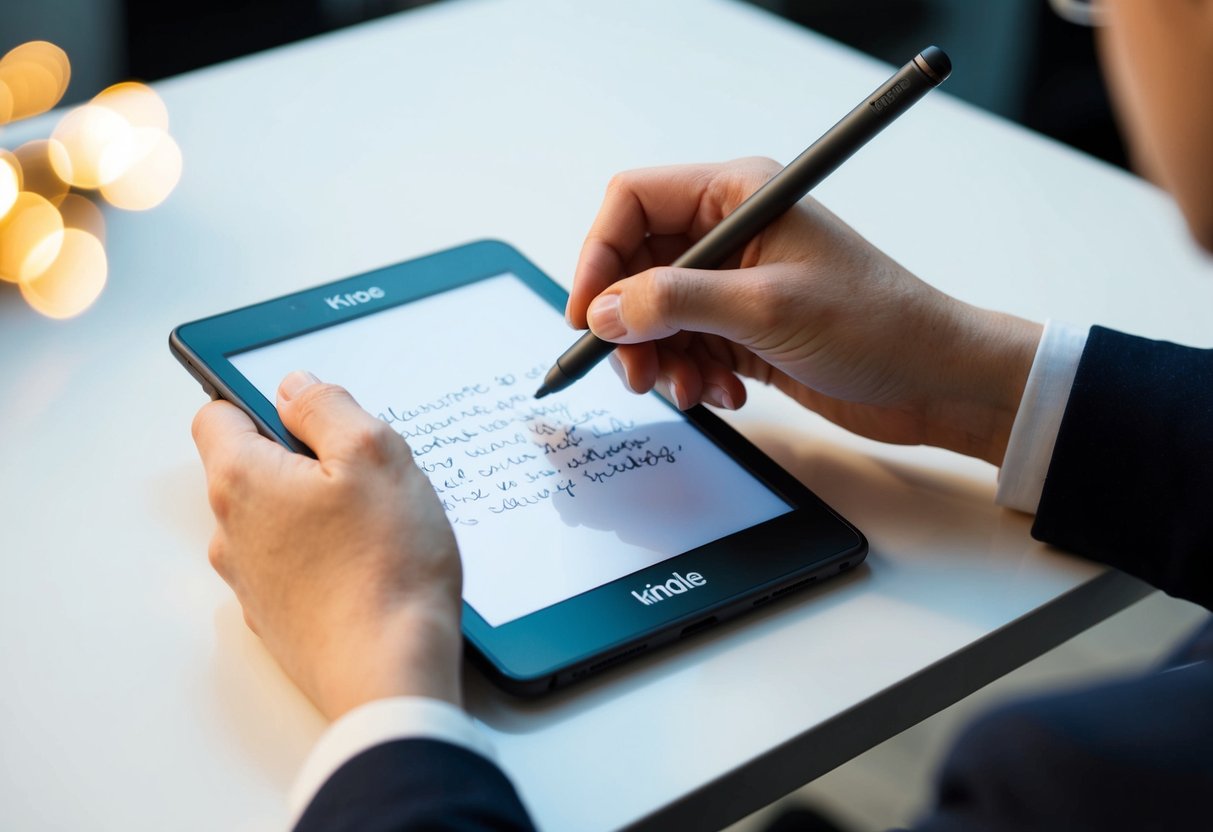
How to Use Kindle Scribe Amazon’s latest e-reader that lets users write and draw on the screen. This device combines the benefits of a standard e-reader with note-taking abilities. It’s a useful tool for students, professionals, and anyone who enjoys reading and writing.
The Kindle Scribe is easy to use with its simple interface and pen-friendly screen. Users can make notes directly on e-books, create to-do lists, and sketch ideas. The device has a 10.2-inch display, which gives plenty of space for reading and writing.
To get the most out of Kindle Scribe, users should explore its features. The device can convert handwritten notes to text, making it easy to organize and search through notes later. It also allows users to import and annotate PDF files, which is helpful for students and professionals who need to review documents.
Understanding How to use Kindle Scribe
The Kindle Scribe combines e-reader and tablet functionality with an e-ink display. It allows users to read and write on the same device, offering a paper-like experience in a digital format.
Kindle Scribe Overview
The Kindle Scribe is Amazon’s first e-reader with writing capabilities. It features a 10.2-inch display with 300 PPI, providing crisp text and images. The device comes with a stylus for note-taking and drawing.
Users can read e-books, PDFs, and other documents on the Scribe. They can also write directly on the screen, making it useful for annotations, journaling, and sketching.
The Scribe offers long battery life, typical of e-ink devices. It syncs with Amazon’s ecosystem, allowing easy access to a vast library of e-books and documents.
E-Ink Display Characteristics
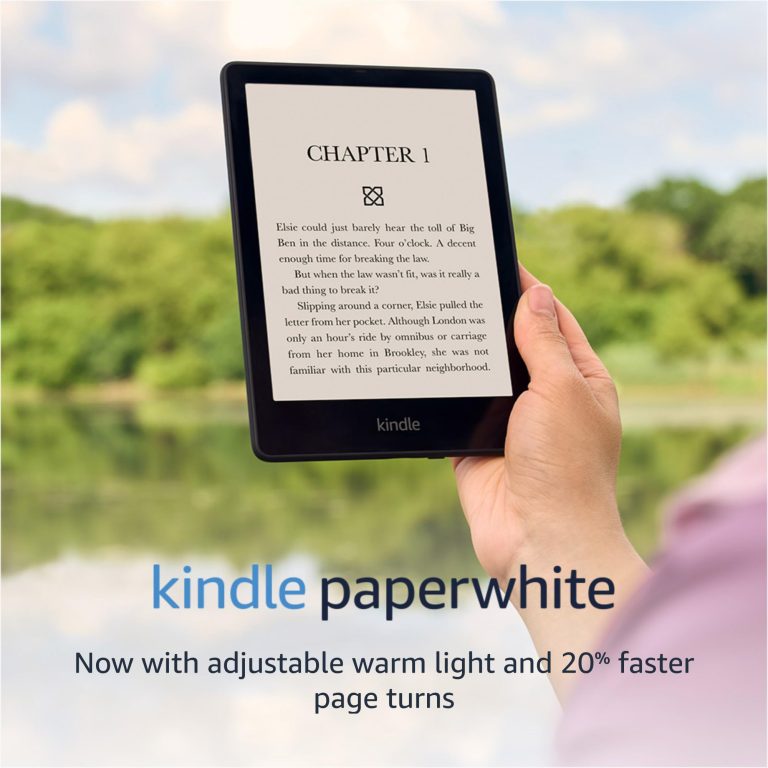
E-ink technology gives the Kindle Scribe its paper-like quality. The display uses tiny capsules filled with positively and negatively charged particles to create text and images.
E-ink screens reflect light like paper, reducing eye strain compared to backlit displays. This makes them comfortable for extended reading sessions.
The display offers high contrast and visibility in various lighting conditions, including bright sunlight. It only uses power when changing the screen content, contributing to the device’s long battery life.
While e-ink displays have slower refresh rates than LCD screens, they provide a more natural reading and writing experience. The technology continues to improve, with newer versions offering faster response times for writing and page turns.
Getting Started with Your Kindle Scribe
The Kindle Scribe is easy to set up and use. This section covers the key steps to get your device ready, from initial setup to software updates.
Initial Setup
When you first turn on your Kindle Scribe, you’ll see the welcome screen. Follow the on-screen instructions to choose your language and time zone. The device will guide you through connecting to Wi-Fi and signing in to your Amazon account.
If you don’t have an Amazon account, you can create one during this process. The Kindle Scribe will then download your previously purchased Kindle content.
Set up a device passcode for added security. This step is optional but recommended to protect your personal information.
Pairing the Premium Pen
The Kindle Scribe comes with a Premium Pen for writing and drawing. To pair it:
- Ensure Bluetooth is enabled on your Kindle Scribe.
- Press and hold the button on the pen for 3 seconds.
- Wait for the Kindle Scribe to detect the pen.
- Follow the on-screen prompts to complete pairing.
The pen doesn’t need charging and works seamlessly with the Kindle Scribe’s writing features.
Charging and Battery Life
The Kindle Scribe uses a USB-C port for charging. To charge:
- Connect the USB-C cable to the Kindle Scribe.
- Plug the other end into a power adapter or computer.
A full charge takes about 2.5 hours. The battery can last up to 12 weeks of reading or 3 weeks of writing, depending on usage.
To check battery level, swipe down from the top of the screen to open Quick Settings.
Connecting to Wi-Fi and Registering Your Device
Wi-Fi connectivity is crucial for downloading books and syncing your progress. To connect:
- Swipe down from the top of the screen.
- Tap “All Settings,” then “Wi-Fi & Bluetooth.”
- Select your Wi-Fi network and enter the password.
If you haven’t registered your Kindle Scribe during initial setup, go to “All Settings” > “Your Account” and sign in with your Amazon account.
Software Update Procedures
Keeping your Kindle Scribe updated ensures you have the latest features and security improvements. To check for updates:
- Connect to Wi-Fi.
- Go to “All Settings” > “Device Options” > “Advanced Options.”
- Tap “Update Your Kindle.”
If an update is available, follow the on-screen instructions to install it. The device may restart during this process.
Enable automatic updates to keep your Kindle Scribe up-to-date without manual checks. Find this option in the same menu as manual updates.
Utilizing Pen Features
The Kindle Scribe’s pen features let you write, draw, and interact with your digital content. The Premium Pen offers extra functions to boost your note-taking and creative work.
Writing and Drawing with the Premium Pen
The Premium Pen is a key tool for Kindle Scribe users. It lets you write and draw directly on the screen with precision. The pen has a comfortable grip and responds to pressure, making your strokes look natural.
You can pick from many pen types, like ballpoint or pencil. Change line thickness by pressing harder or softer. This helps you create detailed sketches or quick notes.
The Premium Pen doesn’t need charging. It attaches to the side of your Kindle Scribe with magnets for easy storage.
Customizing Pen Shortcuts
The Premium Pen has a shortcut button. You can set this button to do different tasks. Some options are:
- Switch between pen and highlighter
- Undo your last action
- Open a new notebook
- Toggle between pen types
To set up shortcuts:
- Go to Settings
- Select “Pen Settings.”
- Choose “Customize Shortcut Button.”
- Pick the action you want
You can change this shortcut anytime. It helps you work faster and switch tools quickly while writing or drawing.
Using the Eraser Tool
The Premium Pen has an eraser tool built in. Flip the pen over to use it, just like a real pencil. The eraser removes your marks cleanly.
You can change the eraser size in the toolbar. A bigger eraser helps remove large areas fast. A smaller one is good for precise fixes.
To erase:
- Flip the pen
- Rub the eraser on your mistake
- Flip back to keep writing
If you make a big mistake, use the undo button instead of erasing. It’s faster for large changes.
Highlighting Text
The Premium Pen works great for highlighting text in books or documents. To highlight:
- Select the highlighter tool
- Choose a color
- Drag the pen over text
You can add notes to highlights. Tap a highlight and select “Add Note” to type or write comments.
The Kindle Scribe saves all your highlights. Find them later in the “Notebook” section. You can also export highlights to other devices or apps.
Note-Taking and Organization
The Kindle Scribe offers powerful tools for capturing and structuring ideas. Users can create notebooks, apply templates, sort notes into collections, and group related materials.
Creating and Managing Notebooks
To start a new notebook on the Kindle Scribe, tap the “Create Notebook” option from the home screen. Users can name their notebooks and customize cover styles. The device allows for multiple notebooks, each dedicated to different topics or projects.
Within notebooks, writers can use a mix of typed text and handwritten notes. The Scribe’s pressure-sensitive pen enables natural writing and sketching. Users can highlight, underline, and add margin notes to their work.
To stay organized, the Scribe lets users add page numbers and create a table of contents. This makes it easy to navigate longer notebooks and find specific information quickly.
Applying Templates for Different Needs
The Kindle Scribe offers a variety of templates to suit different note-taking needs. These include:
- Lined paper
- Grid paper
- To-do lists
- Meeting notes
- Project planners
- Music composition sheets
Users can apply templates when creating a new notebook or insert template pages into existing ones. This flexibility allows for customized organization within each notebook.
For example, a student might use lined templates for lecture notes, grid templates for math problems, and to-do lists for assignment tracking. The Scribe’s templates help structure information for easier review and recall.
Organizing Notes into Collections
The Kindle Scribe allows users to group related notebooks into collections. This feature helps keep reading materials and notes organized. To create a collection, users can:
- Select multiple notebooks
- Choose “Add to Collection.”
- Name the new collection or add to an existing one
Collections can be based on subjects, projects, or time periods. For instance, a researcher might have collections for different experiments or literature reviews.
The Scribe’s search function works across collections, making it easy to find specific notes or topics even in large libraries of notebooks.
Series Grouping for Sequential Materials
For content that follows a specific order, the Kindle Scribe offers series grouping. This feature is ideal for:
- Course notes
- Book chapters
- Project phases
- Journal entries
To create a series, users can select related notebooks and choose “Create Series.” The Scribe will then display these notebooks in the specified order.
Series grouping helps maintain chronology and progression in note-taking. It’s particularly useful for students following a curriculum or professionals documenting long-term projects. The Scribe automatically shows the next notebook in a series, streamlining the workflow for sequential note-taking and review.
Reading and Purchasing Content
The Kindle Scribe offers easy ways to find and enjoy books. Users can browse the Kindle Store, join Kindle Unlimited, and organize their library.
Navigating the Kindle Store
The Kindle Store on the Kindle Scribe is user-friendly. Tap the Store icon to start browsing. Use the search bar to find specific titles, authors, or genres.
The store shows popular books, new releases, and personalized recommendations. Tap a book cover to see details, reviews, and pricing.
To buy a book, tap “Buy now with 1-Click.” The book will download to your device. You can also download free samples before buying.
The Kindle Store offers ebooks, magazines, and newspapers. Prices are often lower than print versions. Sales and daily deals provide extra savings.
Subscribing to Kindle Unlimited
Kindle Unlimited is a subscription service for avid readers. For a monthly fee, subscribers can access millions of titles.
To join, go to the Kindle Store and select “Kindle Unlimited.” Choose the subscription plan and confirm payment. You can now borrow up to 10 books at a time.
Browse the Kindle Unlimited catalog directly on your Kindle Scribe. Look for the Kindle Unlimited logo on eligible books. Tap “Read for Free” to borrow a title.
Kindle Unlimited includes ebooks, audiobooks, and magazines. New titles are added regularly. There’s no due date, so you can read at your own pace.
Managing Your Library
The Kindle Scribe makes it easy to organize your ebooks. Tap “Library” to see all your titles. Books are sorted by recent title or author.
Create collections to group similar books. Tap the three dots next to a book and select “Add to Collection.” You can make collections for genres, series, or any category you choose.
To remove a book, tap and hold the cover. Select “Remove from Device.” This doesn’t delete the book from your account. You can re-download it anytime.
Use the cloud storage to access your entire library. Books not on your device are shown with a cloud icon. Tap to download them.
Importing and Annotating PDFs
The Kindle Scribe lets you read and mark up PDF files. You can add notes, highlight text, and draw on PDFs. This makes it great for work, school, or personal use.
Sending PDFs to Your Kindle Scribe
To get PDFs on your Kindle Scribe, use the Send to Kindle feature. You can email PDFs to your Kindle email address. Or use the Send to Kindle app on your computer.
Another option is to connect your Kindle to a PC with a USB cable. Then drag and drop PDF files onto it.
Make sure your PDFs are small. Big files may take a while to load. The Kindle works best with simple PDFs that don’t have complex layouts.
Annotating PDF Documents
Once you have a PDF open, tap the screen to bring up the toolbar. This gives you tools to write and draw on the page.
Use the pen tool to write notes or draw pictures. The highlighter lets you mark important text. You can pick different colors and line thicknesses.
Sticky notes are great for longer comments. Tap where you want to add a note, then type your thoughts.
If you need more space, you can hide the writing toolbar. This gives you a cleaner view of the page.
Exporting Your Notes
After you’ve marked up your PDF, you may want to save your work. The Kindle Scribe lets you export your notes and highlights.
Go to the PDF’s menu and choose “Export Notebook”. This creates a new file with all your notes. You can send this file to your email or computer.
Your exported notes include text and drawings. They show where each note was made in the original PDF. This makes it easy to review your work later.
Remember, some PDFs may have limits on exporting due to copyright. Always check the rules before sharing marked-up documents.
Accessibility and Security Features
The Kindle Scribe offers tools to make reading easier for all users and keep your device secure. These features help with text-to-speech, device locking, and content control for kids.
Enabling VoiceView for Accessibility
VoiceView is a screen reader that helps visually impaired users navigate Kindle Scribe. To turn it on, go to Settings > Accessibility > VoiceView Screen Reader.
Once enabled, VoiceView reads aloud menu items, book content, and on-screen text. Users can adjust the speaking rate and volume in the VoiceView settings.
The feature also supports gestures for easier navigation. Common gestures include:
- Single-finger swipe: Move through items
- Double-tap: Select an item
- Three-finger swipe: Scroll pages
VoiceView works with most Kindle content, making books and documents more accessible to all readers.
Setting Up Password Protection
Password protection keeps your Kindle Scribe and its contents private. To set it up, go to Settings > Device Options > Device Passcode.
Choose a passcode that’s easy for you to remember but hard for others to guess. Avoid common numbers like birthdays or simple patterns.
The Kindle Scribe will ask for this passcode when:
- Turning on the device
- Waking it from sleep mode
- Accessing certain settings
For added security, enable the option to erase device data after 10 failed passcode attempts. This protects your information if the Kindle Scribe is lost or stolen.
Configuring Parental Controls
Parental Controls let adults manage what content kids can access on the Kindle Scribe. To set them up, go to Settings > Parental Controls.
Create a parental controls password. This is separate from the device passcode and should be kept secret from children.
With Parental Controls, adults can:
- Restrict access to the Kindle Store
- Block web browser use
- Prevent in-app purchases
- Limit access to certain books or content types
Parents can also set up separate profiles for kids with age-appropriate content. This ensures children only see books and media suited for them.
Remember to update Parental Control settings as kids grow and their needs change.
Maintenance and Troubleshooting
Proper care and upkeep of your Kindle Scribe ensures optimal performance. Regular updates, connectivity checks, and smart battery management help keep your device running smoothly.
Performing Software Updates
Software updates are crucial for the Kindle’s performance and security. To check for updates, go to Settings > Device Options > Advanced Options > Update Your Kindle. If an update is available, tap “Update” to start the process.
Always keep your Kindle Scribe connected to Wi-Fi to receive automatic updates. Updates usually download in the background when the device is idle and install during the next restart.
If your device isn’t updating automatically, try restarting it. Hold the power button for 40 seconds until the screen goes blank, then release. The device will reboot and may trigger the update.
Solving Bluetooth Connection Issues
Bluetooth connectivity allows the Kindle Scribe to pair with accessories like keyboards. If you’re having trouble connecting, try these steps:
- Ensure Bluetooth is turned on in Settings
- Restart both the Kindle Scribe and the accessory
- Delete the pairing and reconnect
If problems persist, check for interference from other devices. Move away from Wi-Fi routers, microwaves, and other electronics that might cause signal disruption.
USB-C Port Care and Cable Management
The USB-C port on the Kindle Scribe is used for charging and data transfer. Keep it clean and free from debris to ensure proper function. Use a soft, dry toothbrush to gently remove any lint or dust.
When plugging in cables, insert them straight and avoid wiggling. This prevents damage to the port. Store cables neatly to avoid tangles and bends that can lead to fraying.
Use only high-quality, certified USB-C cables for charging and data transfer. Low-quality cables can damage the port or provide insufficient power.
Maximizing Battery Life and Efficiency
The Kindle Scribe boasts long battery life, but proper management can extend it further. Adjust screen brightness to a comfortable but lower setting to conserve power. Use airplane mode when you don’t need connectivity.
Avoid extreme temperatures, as they can affect battery performance. Don’t leave the device in direct sunlight or very cold environments.
Turn off the device when not in use for extended periods. A full shutdown, rather than sleep mode, prevents background processes from draining the battery.
Regularly check for software updates, as they often include battery optimization improvements. Keep your e-books and documents organized to reduce indexing time, which can drain the battery.


